| I often find myself wandering around drawing inspiration from other people’s work with house design and decorations. This is one of those things I saw and thought it would be great for the website. I hope you enjoy. |
Items Needed:
- 3 Tall Barrels
- 2 Large Wood Tables
The Decorator Tool is needed for this tutorial. |
|
| This design can be made facing east or south – for the tutorial, I will be building one facing south. |
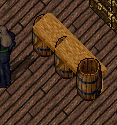
| First, place the two tables side by side overlapping and lock them down. When placed side by side correctly, they are seamless across the top and appear as a larger table.
If they place facing the wrong direction, use your decorator’s tool to turn them appropriately. |
 |
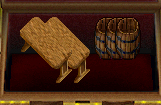
| The next step is to simply place a barrel on top of each table, and then the third barrel at the end of the west table, so it appears to be underneath the table.
When finished, it should look like the image to the right.
Don’t forget to lock them down! |
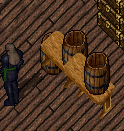 |
| Lower all the barrels down until they cannot be lowered anymore.
As you can see, the tops of the barrels still poke out a little bit and the barrel on the east side now appears to be overlapping the table.
|
|
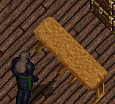
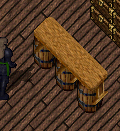
| To finish up your work bench, raise each table 2 times with the decorator’s tool.
It makes a difference when you place it up against a wall and decorate with items you would find in a workshop.
|
 |
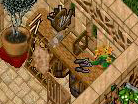
| For extra storage space in your workroom, use storage barrels or covered barrels instead of water barrels.
Below is the original image I took of the house with this set up – complete with decorations on top of the table. This house was on an Asian Shard although I cannot remember which.
|